Popular search
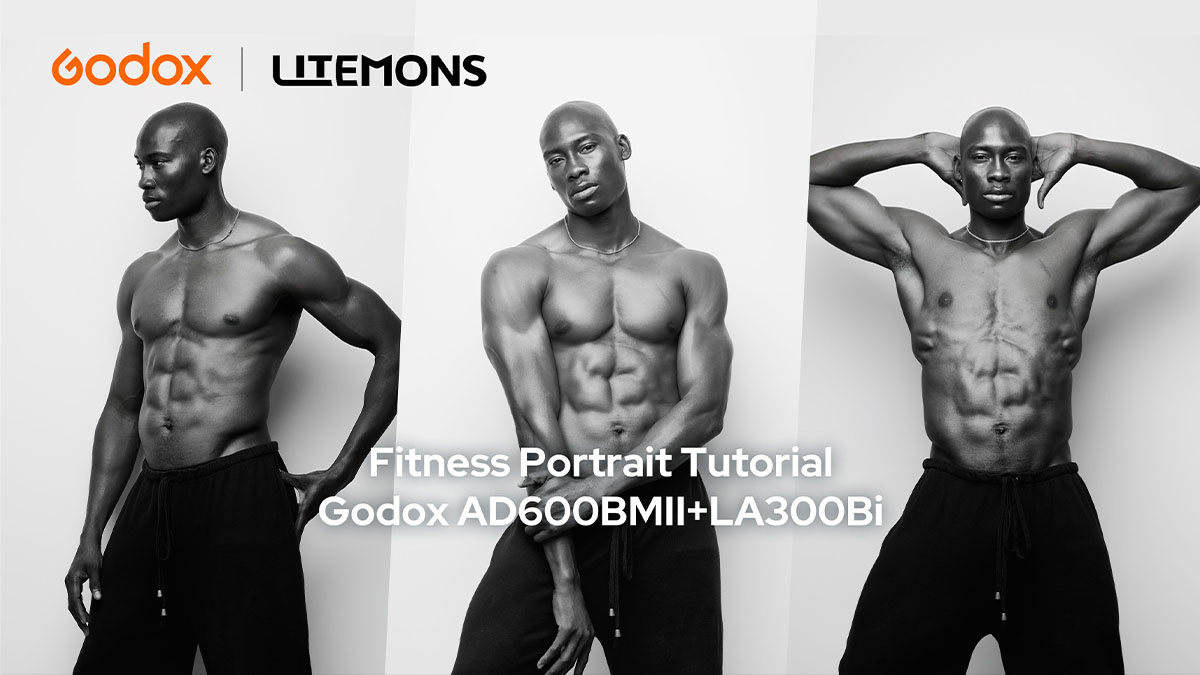
In this tutorial, photographer Tosin Junaid creates black-and-white fitness portraits with the Godox AD600BMII and Godox LA300Bi. The setups use direction, shadow, and controlled highlights to bring out muscle shape and body lines.
The shoot starts with one feathered key light, then adds negative fill, backlight texture, and selective highlights. Each step has a clear purpose, so the lighting stays strong without becoming hard to follow.
Equipment
• Main Light: Godox AD600BMII
• Continuous Light: Godox LA300Bi
• Light Shaper: Godox UL-Octa Box 150
• Projection Attachment: Godox BP-SE
• Accessories: black flags / black reflectors, and pattern gobo

Look 1: Feathered Single Light
1. Situation: Fitness portraits need light that shows shape. A straight-on light can make the body look flat.
2. Challenge: The subject needs strong direction, but the light still has to look clean and controlled.
3. Solution: Use the AD600BMII with a UL-Octa BOX 150 as the key light. Place it above and slightly to the side, then feather the softbox so the edge of the light falls on the subject.
Quick Tip: Feathering helps keep the background darker while shaping the body with side light.


Look 2: Add Negative Fill for More Contrast
1.Situation: Studio walls and floors can bounce light back into the shadows.
2. Challenge: Too much bounced light lowers contrast and makes the muscles look less defined.
3. Solution: Add black flags or black reflectors on both sides of the subject to absorb the bounced light and keep the shadows deeper.
Quick Tip: In fitness portraits, shadows are not something to remove. They help define the body shape.

Look 3: Add Backlight Texture with LA300Bi
1.Situation: A plain background can look empty if there is no shape or texture behind the subject.
2. Challenge: The background needs interest, but the subject should still be the main focus.
3. Solution: Use the LA300Bi with the BP-SE projection attachment behind the subject to project a defined light pattern onto the background. The AD600BMII keeps the subject lit from the front or side.
Quick Tip: A projection light works best when it has a clear target. Aim it at the background or a selected area, not everywhere.

Look 4: Silhouette and Selective Highlight
1. Situation: The final look is the most dramatic. The goal is to make the outline strong while showing only selected details.
2. Challenge: If everything is lit, the silhouette disappears. If nothing is lit, the body loses its shape.
3. Solution: Move the AD600BMII behind the subject to create a backlit base. Then use the LA300Bi with BP-SE to place a focused highlight on the parts of the body that need detail.
Quick Tip: Control where the viewer looks. Let some parts stay in shadow so the highlights feel more powerful.
Black and white is a useful test for this kind of portrait. If the image looks flat without color, add more direction, reduce unwanted fill, or use a tighter highlight until the body lines are clear.

Gears Used
• Godox AD600BMII
• Godox LA300Bi
• Godox UL-Octa BOX 150
• Godox BP-SE Projection Attachment
• Black flags / black reflectors
• Pattern gobo